Topic outline
-
This course will show you how to use outlook, from basic features to the more advanced abilities.
Using Outlook
- Sending New E-mail
- Opening e-mail
- Replying
- Forwarding
- CC and BCC
- Categories
- Flag/Tasks
- Calendar use
- Meeting requests
- Contacts
- Distribution groups
Other Training courses can be found in the Training Category
- Sending New E-mail
-
Sending New E-mail
Sending new e-mail is one of the most important features of outlook. It is a relatively straightforward process to send a new mail, and this guide will take you through.
To begin with you need to click on the "New" button. This can be found in the top left hand side of the screen under the File Menu.
This will cause a new blank e-mail to open.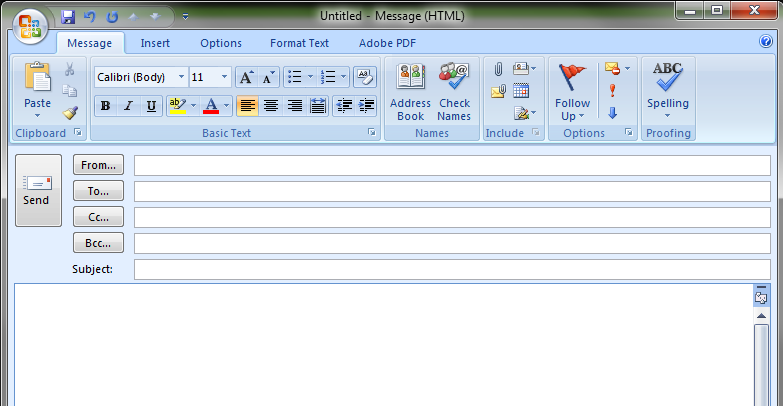
The "To..." field is where you input the address you wish to send it to. This will normally be in the form of jsmith@hotmail.com
School addresses end in @fulford.york.sch.uk
The "Subject:" is the title of the e-mail. This is what displays in the Inbox of the person receiving it. It is a good idea to make this informative.
For example:
Subject: Documents
Isn't very descriptive
Subject: Course specification for A Level Science
Is much better.
The large white area is where you type the bulk of your message. You can use the same formatting as you can in Word (or even copy and paste a message in).
Once you've finished the e-mail, click send to dispatch it on its way.
-
Opening E-mail
When you open outlook your inbox is displayed. This will show a list of your e-mails, and unread ones are shown in bold. Often users have a "Reading Pane" which shows a preview of the e-mail, either on the right or at the bottom.
This is a sample shot of an inbox: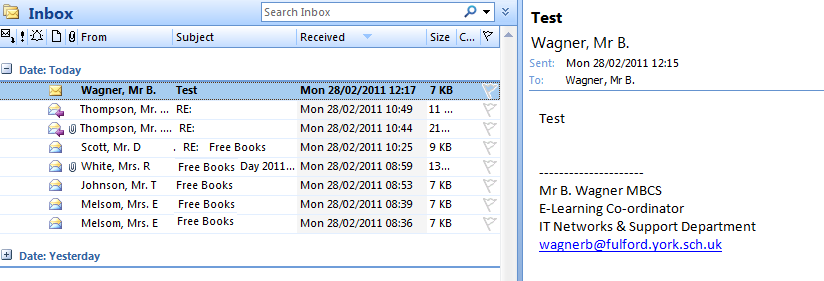
Double clicked on your mail in the list will open it in its own window. This will make it easier to read, and give you the options to reply or otherwise deal with the e-mail.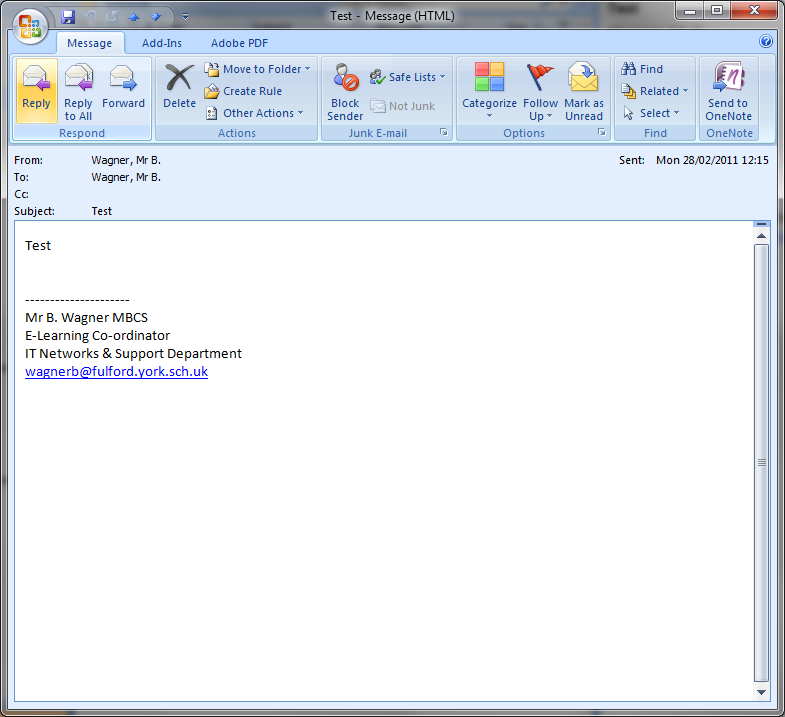
-
Replying
When you have an e-mail open hitting the "reply" button (highlighted in yellow below) will let you send a response to the e-mail.
This will open up a new message, with a copy of the message just received below. It will also automatically insert the e-mail address of the person you received the e-mail from, making it easier to reply.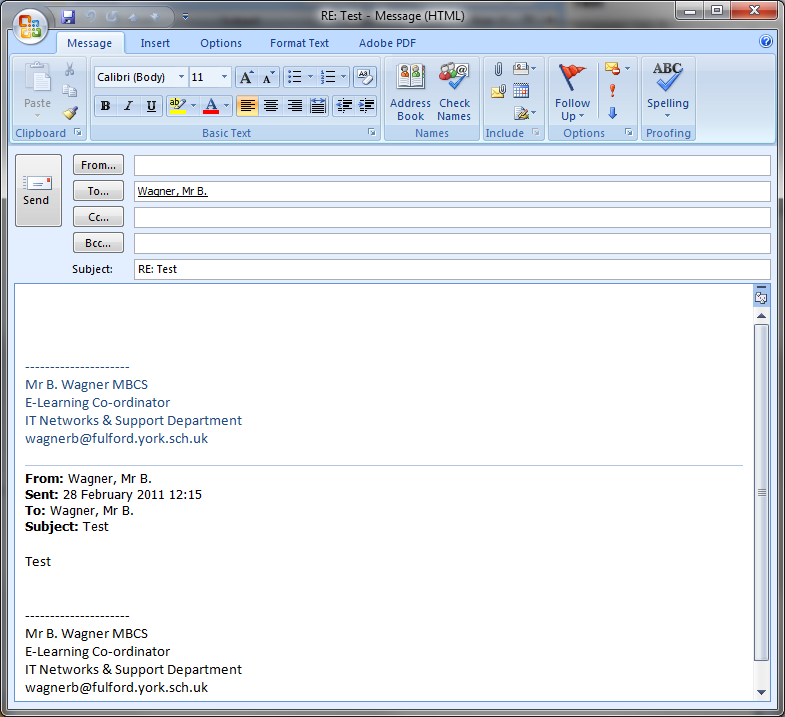
Simply hit send to mail the response.
-
Forwarding
Forwarding e-mail works in broadly the same way to replying. Once you have an e-mail open click the "Forward" button (highlighted in yellow below).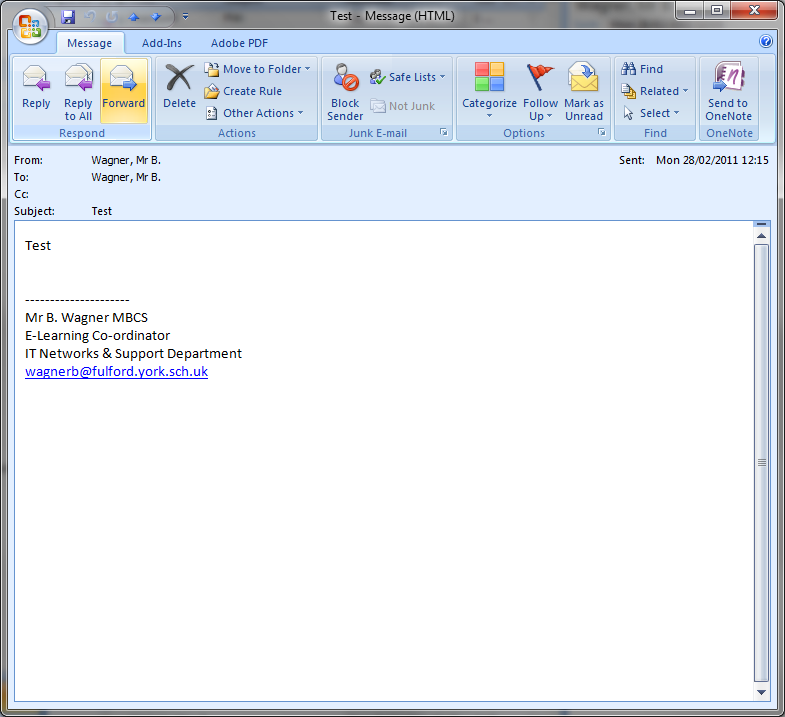
This will open up a new window that has a copy of the e-mail you've just been viewing in. However this time no address is filled in, so that you can pick who to send on the e-mail to.
As ever clicking send will dispatch the e-mail.
-
CC and BCC
CC stand for Carbon Copy, and it means to send a copy of the e-mail you're about to send to someone else. In a lot of ways its no different from sending it to them directly, but in Business terms it can often signify that an e-mail is addressed to Mr. O but you're also showing Mr. O's boss the correspondence as well. It makes it clearer who the e-mail is for, and who it's copied to for information.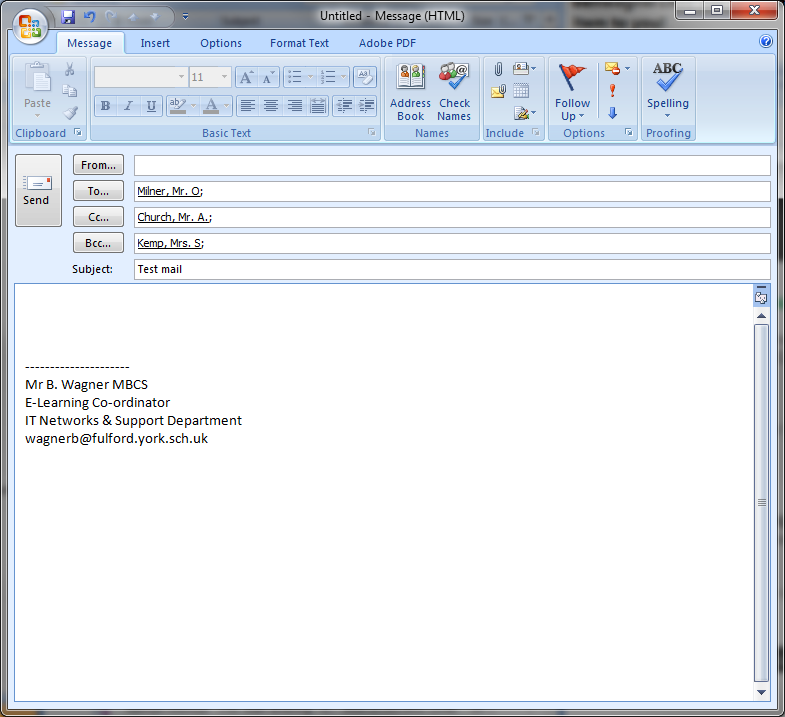
BCC is basically the same as CC but the B stands for Blind. This means that the recipient doesn't know that you've copied the e-mail to someone else, keeping this information confidential.
-
Categories
Categories are a useful colour code for your e-mails. This is very useful for reminding yourself of an e-mail, or marking a group of e-mails that are about the same subject.
Left click on the box (shown below) to highlight the e-mail, and place it in the Red Category by default. As you can see it both marks the e-mail, and is highlighted on the reading pane. Clicking the same box again with remove the category.Sometimes you wish to use more than one category. Right click will open up the menu, where you can pick which colour you wish to use.
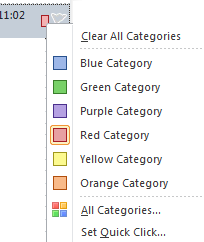 Clicking on one of these will assign this as an additional category. If you wish to remove the original red category simply right click, clicking on the red option to remove it.
 -
Flag / Tasks
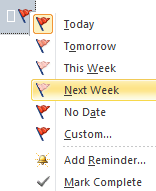
Flags are used for marking something as a follow up task to do later. This can be a useful way of managing workflow within outlook. You assign them in a similar way to categories, this time by clicking on the grey flag, this immediately flags it with a red flag and puts it in your task list.
 If you click it again, it changes to a "Tick" this signifies that the task is complete.
 If you right click you can change the due date for the task, this makes it pale until the job is imminent or overdue when it gets darker again.
-
Calendar use
The Outlook Calendar can be very useful for planning your time. In this section we'll look at scheduling appointments, in the next topic we'll look at inviting people to meetings.
First click on the Calendar button in the bottom left of your outlook window to go to the calendar.
This shows your calendar, automatically centered on the current day & week. You can see some appointments are booked in this calendar. If you want to create a new appointment click on the New Appointment button in the top left of the screen.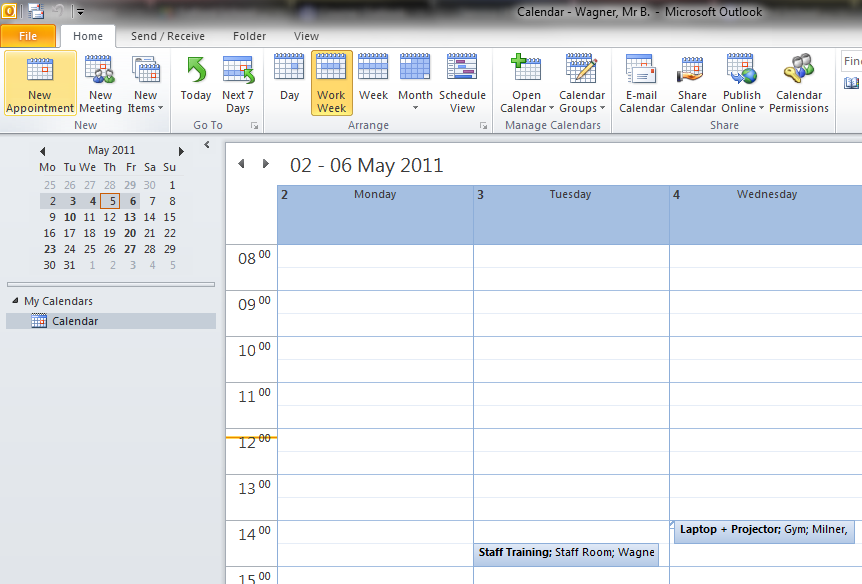
This will open up your new appointment window. Type in the subject of your meeting, and if you wish the location of the event. The start and end time default to the current day and time. Use the drop down boxes to change it. The date drop down box opens a calendar window which makes it easy to place the appointment. The time box opens a list of Hours and half Hour slots. If you want a more precise time (12:05 for example) you can type it into the box.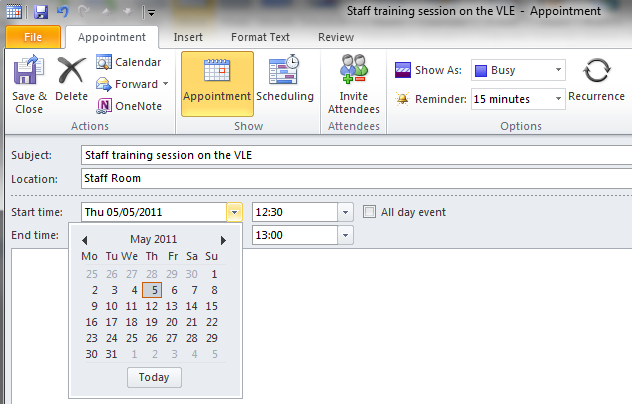
Clicking save and close will save this appointment and place it in your calendar.
Another useful feature can be "Recurrence" this can be useful if you want to schedule a regular event, like putting in your teaching timetable. Click the Recurrence button to open this menu
You can then choose how regularly it repeats (weekly for instance) and what day(s) it repeats on (by default the one that the appointment is booked for). You can then set for how long it runs, either endless, till a particular date, or after a set number of repeats. As you can imagine this can be very useful for things like term timetables.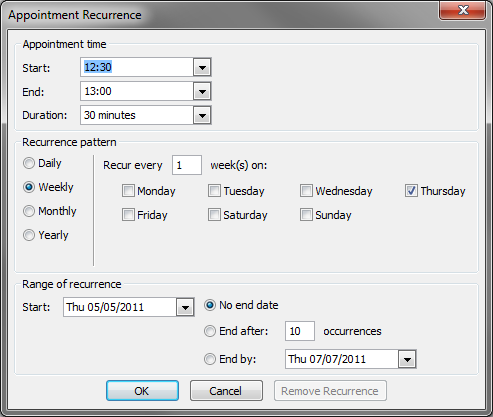
-
Meeting Requests
Meeting requests are a more advanced form of an appointment. You can invite other staff to it, and if they accept its automatically placed in both of your calendars. On the Calendar screen click "New Meeting"
As you can see the majority of the fields are the same as an appointment, which we've already dealt with above, including time and recurrence. Type who you wish to send into the "To..." box exactly like an e-mail, clicking on the "To..." button will even bring up the address book for you to pick up. Click send to send it.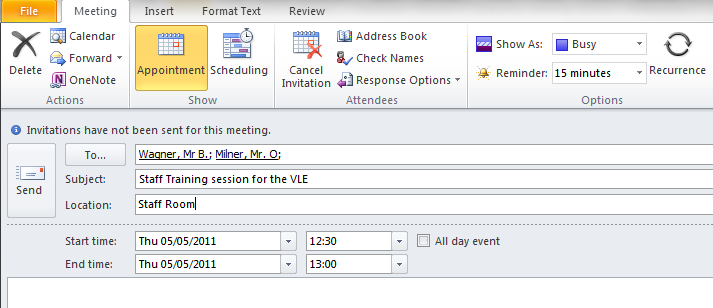
This will appear as an e-mail in the recipients inbox. Opening it will give them details of the meeting, they can then either Accept, Accept Tentatively or Decline. This response is sent back to you.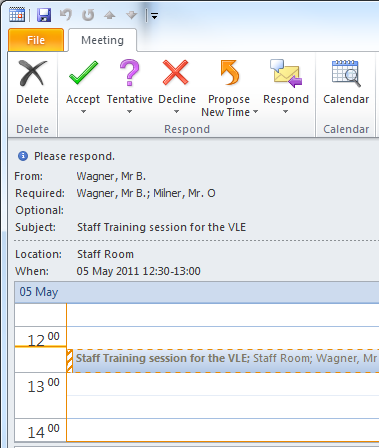
-
Contacts
Contacts is the electronic equivalent of your address book. Clicking the contact button in the bottom left will take you to the contact page. This is where contacts can be added, are stored and can be used.
Clicking "New Contact" in the top right will open up the new contact window. you can type in as many details as you wish, the minimum is Full Name and E-mail Address. This auto fills in the details on the business card on the right. Clicking "Save and close" saves the contact so they can be used.
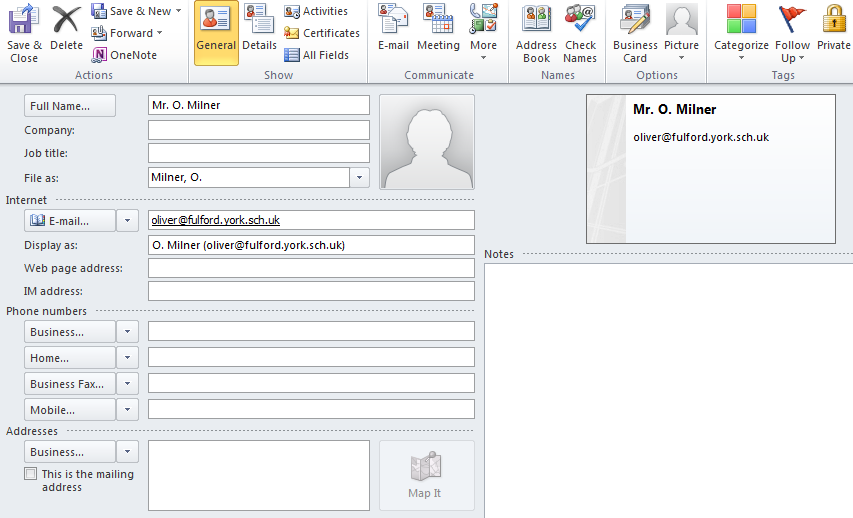 In the contacts window click the contact once to highlight them, then use the "Communicate" box at the top to send them e-mail or a meeting request. You can also right click on the contact and use "Create"
-
Distribution Groups
A distribution group can be very useful for e-mailing the same group of contacts regularly. Click the "New contact group" button at the top of the screen.
This brings up a new untitled group. Type the name of the group in "Name". Click "Add members" to select new members. You have the option to add from "Outlook Contacts" (which we've just been adding to) and from the "Address Book" which is the directory of all the users in school.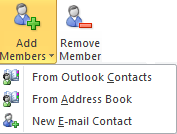
Click on the name of the person you wish to add, then click the members button to add them. Press okay to add them.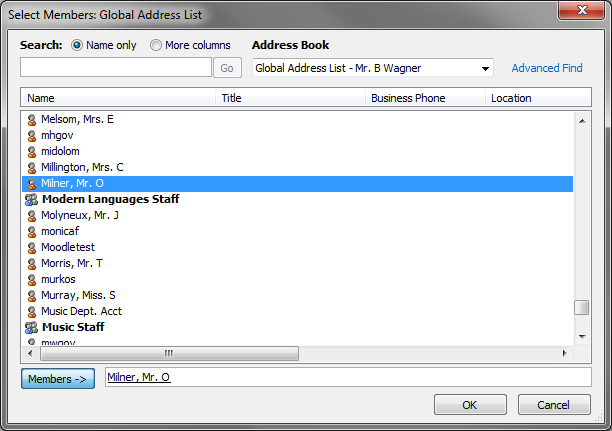
Pressing save and close will save this list for later use. You can then either use "Communicate" or right click to "Create" to communicate with them in the same way as you can with a contact.