Topic outline
-
Advanced use of
Microsoft Word
This course will deal with some of the advanced features of Microsoft Word. It assumes a general working knowledge of this software.
Other Training courses can be found in the Training Category -
Using Word Art
Word Art can be a very useful tool for making your word documents looking more interesting. Word Art is a short cut to nice headings, you can use one of their pre-formatted options to save you having to pick all the options individually.To use word art, click on the insert tab at the top of the program, then click on "word art" which normally displays on the right hand side of the ribbon.This will bring up all the pre-formatted options for word art. Simply click one to insert some sample text.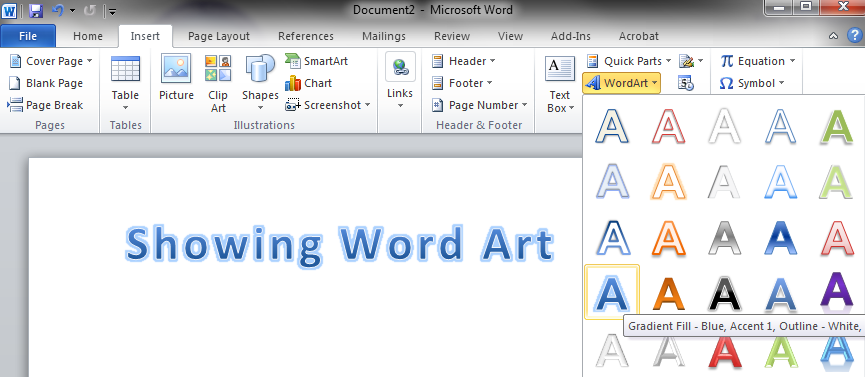 As you can see there are many useful options for your word art.When it insets the word art the software automatically opens it up for editing.
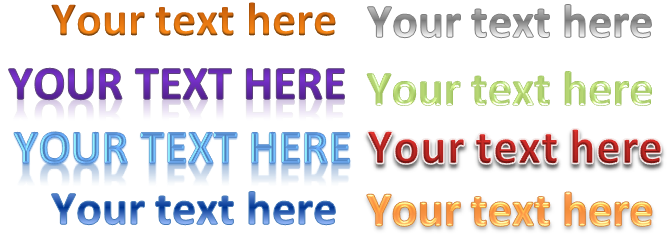
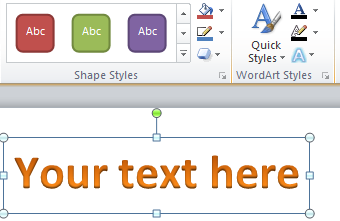 Click on the "Your text here" to edit it. You can replace that with whatever text you want it to display. The options above also let you make further edits to the way the word art displays. You can change the "Shape Styles" this will make the shape show a background. The fill and line styles next to it can be used to change the colours of your word art. The small square beneath can be used to add shadow to your text. The quick styles button can be used to pick a different quick style from the Word Art list. The text effects button to the bottom right can be used to add a selection of styles like Bevel & Glows. We have included a selection of ideas for word art below using only the "Quick Styles" to give you some inspiration.
-
Mail Merge
A mail merge can be a simple way to send a personalised letter to a large group of people. The first step is to get all of the information in one place. In this case we'll be working with 3 people, I've recorded their Name, Address and Phone number in an excel spreadsheet and saved it. It can make it easier to do the mail merge later if you cut up the sections into small chunks, so in the case having Title, First Name, Last name is easier to handle than just "Name".Next open word up, click "Mailings" then mail merge, then the Step by Step wizard. This is the easiest way to do a mail merge.
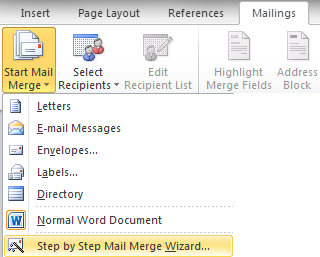
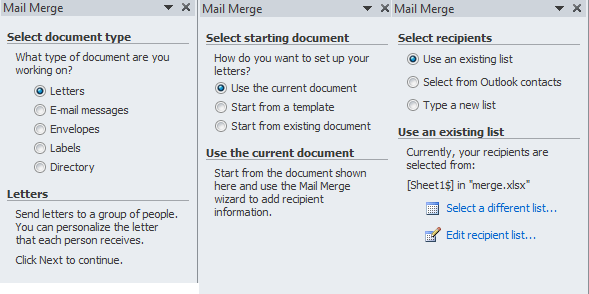 Here are the first 3 wizard menus you'll encounter. In our document we'll be writing a letter and using the current document. On the third window click the browse button to pick your spreadsheet from earlier and select it.The next step is to write the letter, you need to write it normally but where you'd put the address and greeting lines use the wizard options highlighted below. You should end up with a letter looking like the example here:
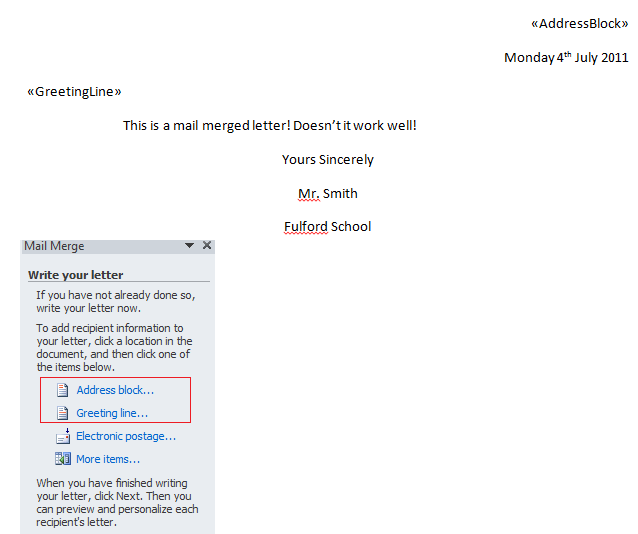 Clicking next will take you to a preview of the letters. If everything looks correct click next again to complete the merge. This will then present you with an option to print out the mail merged letters.
 -
Bullets & Numbering
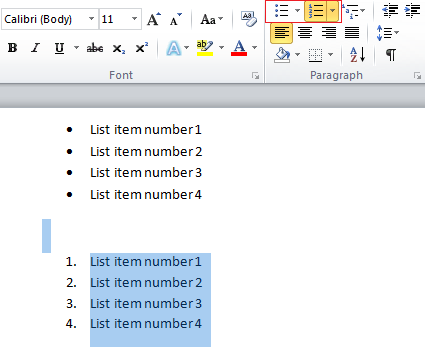
Bullets & Numbering can be used to sort out your information in a document and make it easier to use. First write your list, putting each item on a new line. You need to select the text for the list, drag over the text you wish to make into the list. You can then either use the bullet button or the number button to add bullets or numbering to your text as below:
 The down arrow next to either the bullet or numbering buttons will open the drop down menu where you can select other bullet or number options, like below:
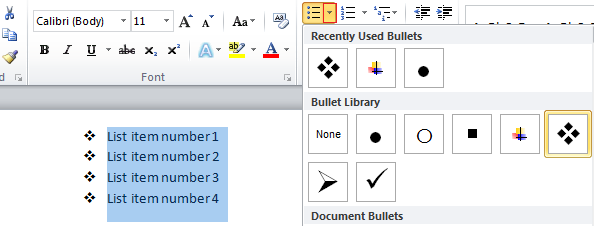 Using the button at the bottom of the menu you can click to pick another symbol, for instance one from a picture.On the drop down pick "Define New Bullet..." from the bottom of the menu.Click on "Picture" to select a picture to be used. Using the "Import" button will let you select one of your pictures to use as a bullet.
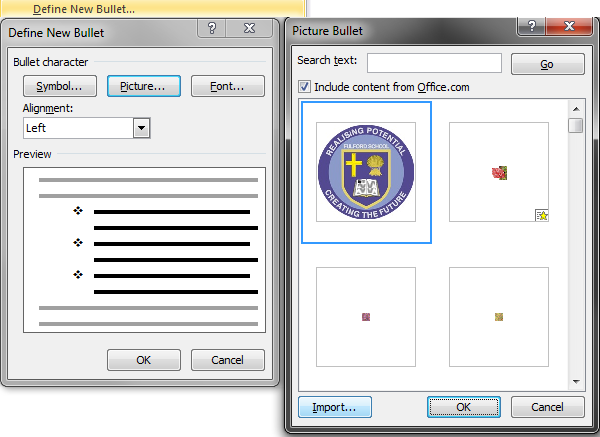 Word automatically resizes the picture to fit with the bullet size and shows them on your document.
 Another useful feature can be to have sub items, if you make sure you are on the far left of the item, so to the left of the L in this example, and then press the Tab key you will create a sub item. You can do this to several levels as well.
-
Headings & Styles
Word comes with a number of preloaded styles that can make you life easy when you come to format your document. These can be found on the top right of your ribbon at the stop of the screen. Highlighting you text (by dragging over it) and click one of the buttons to apply that style. Some examples are below:
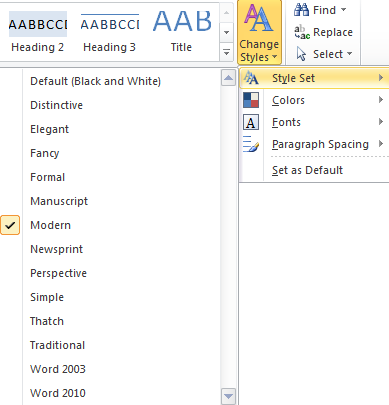
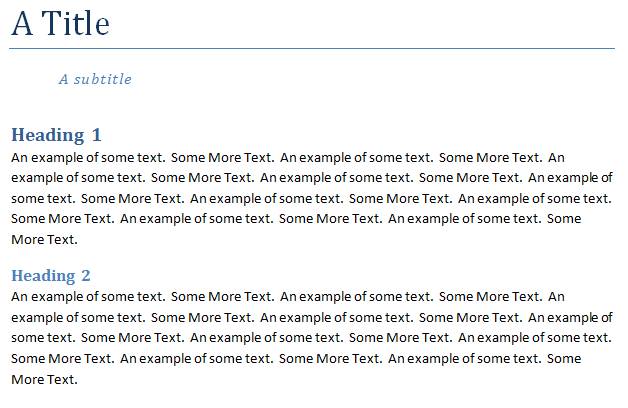 These mean you can have clear and consistent formatting throughout the document making it look more professional.You can also change the formatting on the default styles to reflect your preferred colours.Clicking the "Change Style" button will bring up the menu, you can either pick one of the other pre-defined formats or pick the colours and fonts individually.
-
Contents Pages
Contents pages can be very useful, but very time consuming to produce. Going and finding the page numbers for each heading in a 200 page document can take a long time, and worse if your contents page ends up going over to two pages, all the pages numbers you've checked become incorrect.Word has Contents pages built in, which will automatically find all your headings if you've used the heading "Styles" from the topic before. IT can also automatically update in case your page numbers change.First go to the references tab on the ribbon, and then select "Table of Contents" then "Automatic Table"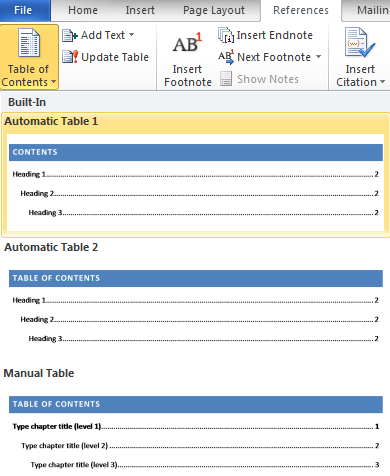 This will insert a table that matches your styles like this:
 Often while your drafting your document you'll make sufficient changes that you'll need to get Word to update your page numbers. It is also worth doing this as a double check before making a final print out of your document.To do this simply click on the table of contents, then click the "update table" link that will appear above it. This will automatically update all the numbers.
 Updating the entire table will also pick up any changes to the headings that have been made, as well as their locations. Both processes are usually fairly instantaneous, but be aware on an exceptionally long document it may take some time.
 -
Headers & Footers
Headers and footers can be a useful way of organising your document, from the basic like page numbers, to the more advanced like author details and handling instructions.The easiest way to access a header or footer is to double click on it, though they can also be accessed from the "Insert" tab on the ribbon.Opening them in either way will open up the header and footer tools ribbon.The buttons on the left of the ribbon let you enter pre-produced options for the header and footer, including auto-updating page numbers.In particular the page numbers can be useful. Simply clicking one on the pre-formatted options will insert it in your document. You can also just type directly into the header or footer to create custom content. The example below has a custom typed header and a pre-formatted footer.
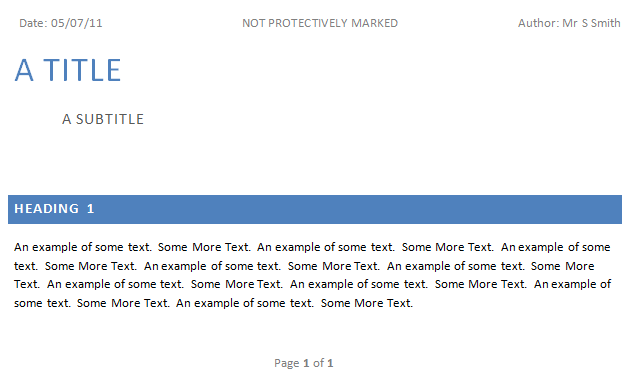 Also on the ribbon is the "Different first page button" this can be very useful if you want to use a title page, and not have the page numbers or other details on it. Simply click this tick box and then edit the first page directly.